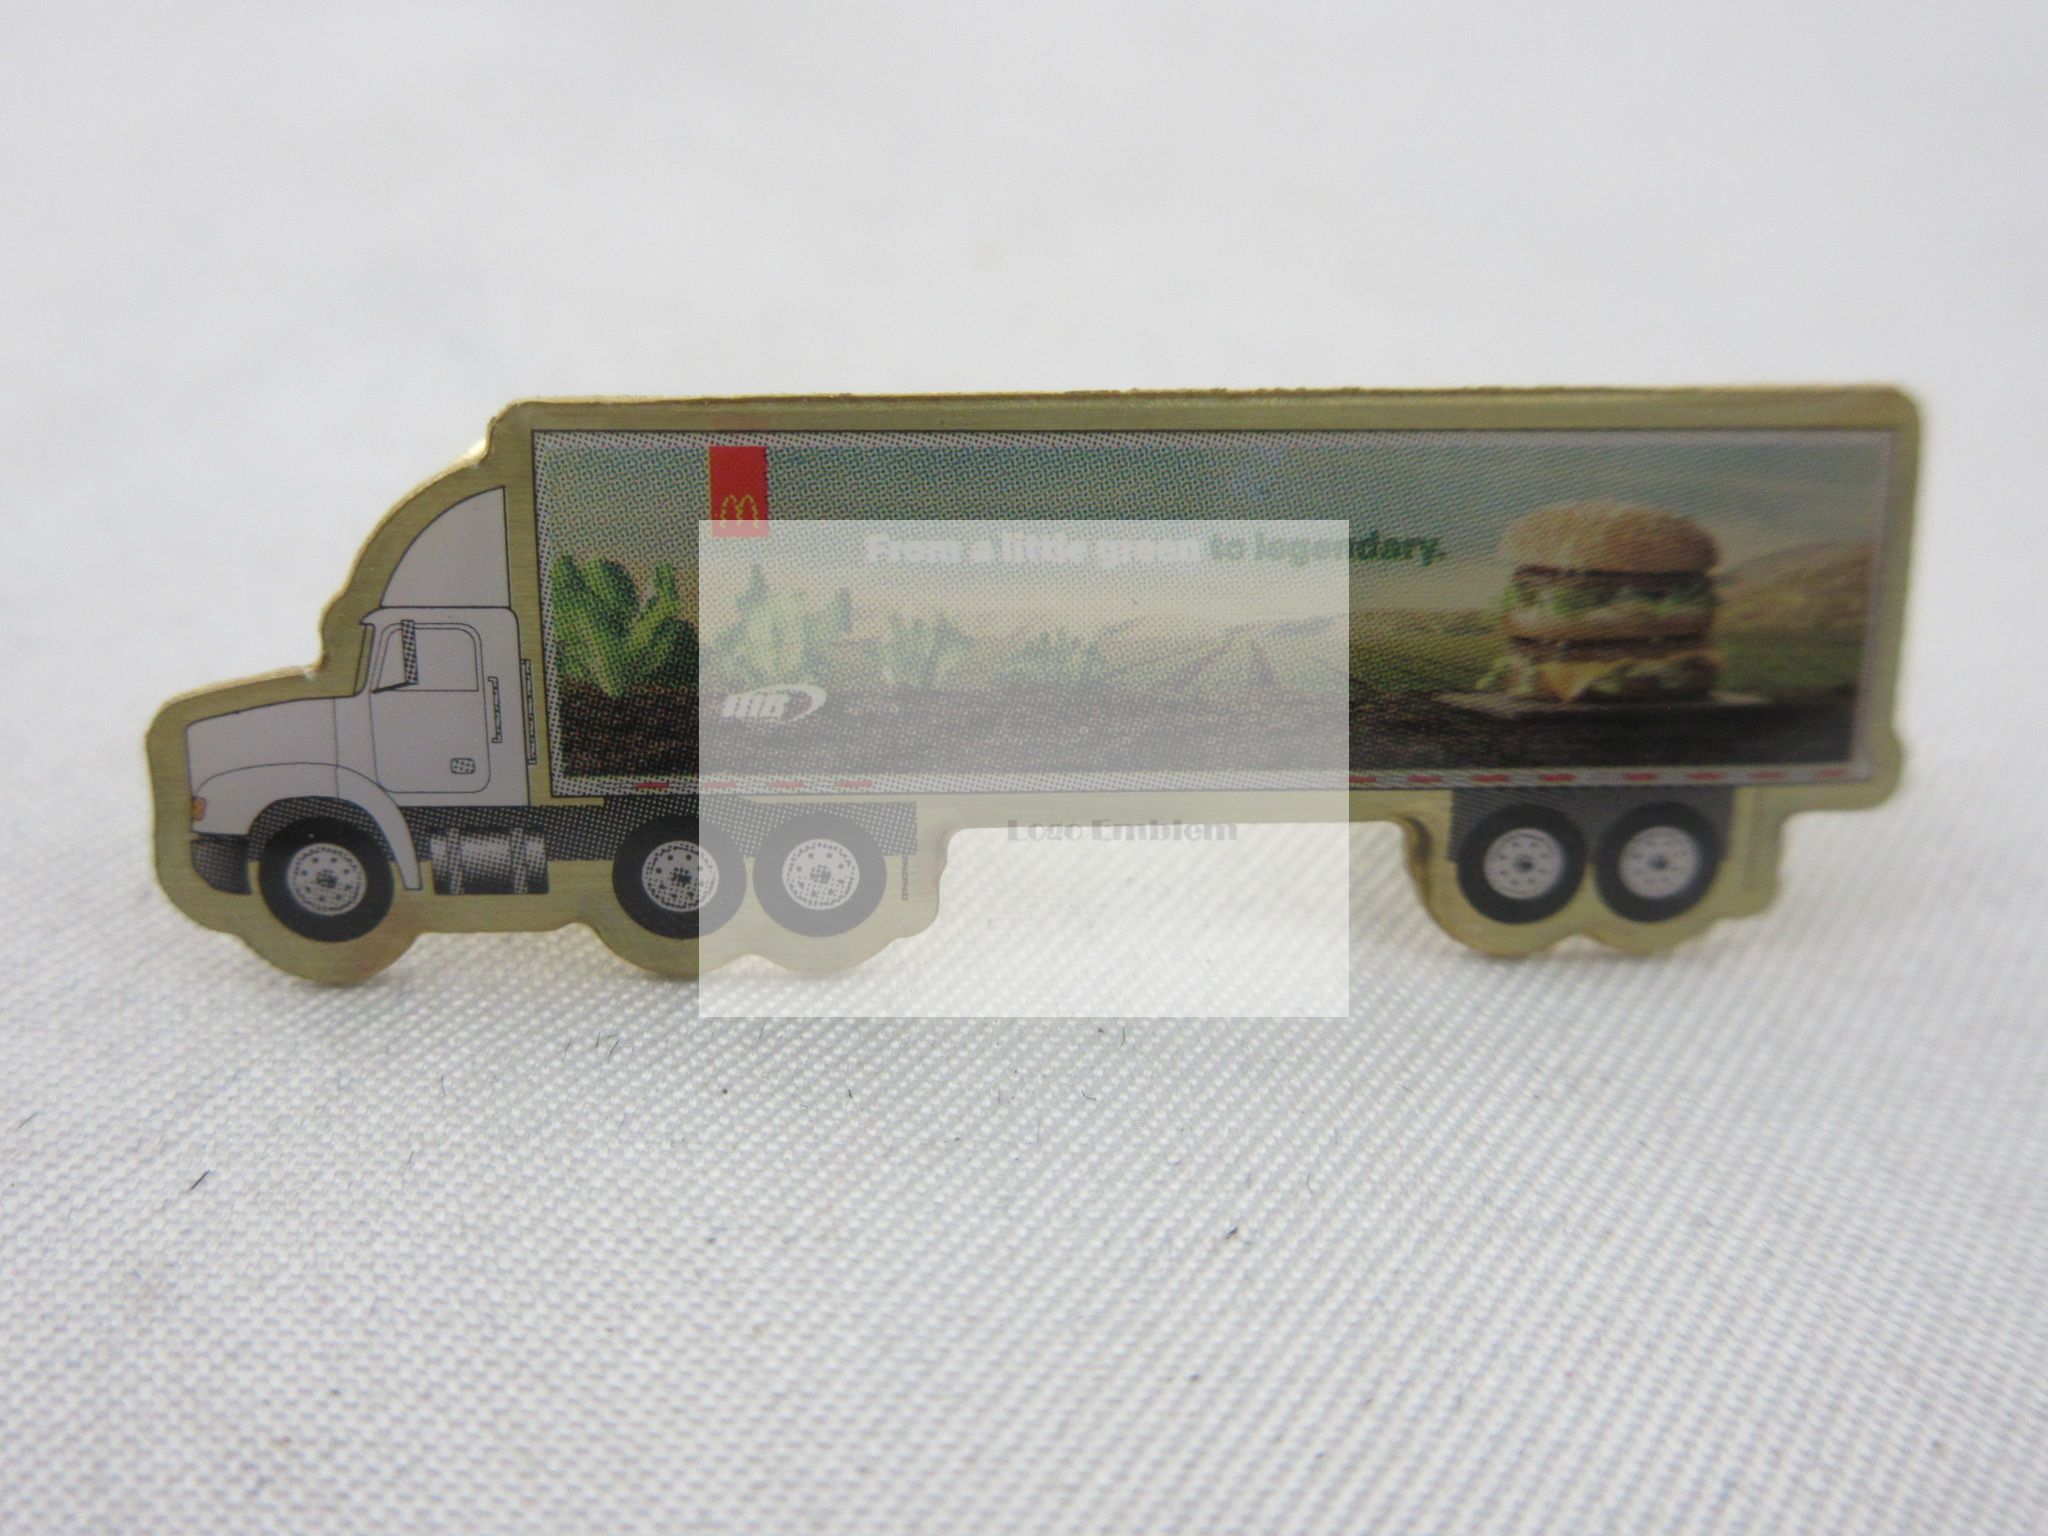
Translating a highly detailed corporate logo into a physical lapel pin often forces a difficult compromise. Designers routinely strip away gradients or drop subtle colors. Sometimes they simply increase the pin size to accommodate traditional manufacturing limits. Standard enamel processes require raised metal borders. These borders separate colors physically to prevent messy paint bleeding. Consequently, photographic elements, fine typography, and complex shading become impossible to replicate accurately.
The solution lies in offset printed manufacturing. This method acts as the definitive choice for exact artwork replication. It perfectly bridges the gap between digital design fidelity and physical metal production. By leveraging CMYK printing, you eliminate restrictive metal borders entirely. You will learn exactly when to abandon traditional enamel in favor of direct-to-metal offset printed pins. We will explore the technical advantages, evaluate production frameworks, and review strict artwork requirements for flawless execution.
Key Takeaways
Offset printed pins utilize CMYK printing directly onto the metal surface, eliminating the need for metal separating lines.
They are the only viable option for designs requiring gradients, drop shadows, photographic images, or typography smaller than 2mm.
A clear epoxy dome is standard on these pins, providing a smooth, protective finish that prevents scratching and fading.
While hard enamel pins offer a classic, jewelry-like feel, offset printing guarantees strict brand identity compliance without artwork modification.
The Design Threshold: When Traditional Enamel Fails Complex Artwork
Every manufacturing method has strict physical boundaries. You must understand these limits to choose the right production style. Die-struck items rely on stamping machinery. Heavy presses force a design into a solid base. This process creates high and low areas. Workers inject liquid paint into the low areas. However, liquid naturally spreads. Therefore, every distinct color must sit behind a raised metal wall.
This physical constraint defines both soft enamel pin and hard enamel production. If you remove the metal wall, the liquid colors mix. They pool together and ruin the design. This barrier makes many modern logos fundamentally incompatible with traditional processes. You must identify these un-pinnable designs early to avoid costly production delays.
Consider the following elements that force a transition to printed alternatives:
Gradients and Ombré: Enamel strictly utilizes solid spot colors. You cannot blend liquid paints to create smooth transitions. If your logo fades from dark blue to light blue, enamel cannot replicate it.
High Color Counts: Most traditional designs use three to five colors. Designs exceeding seven to ten colors create severe complications. The factory must carve tiny metal walls for every single hue. The item becomes cost-prohibitive. Often, it becomes physically impossible to manufacture in a small format.
Micro-Typography: Small text fails completely in die-struck formats. Letters require negative space. If a letter is too small, the liquid paint fills the negative space. The text becomes an illegible blob. Trademark symbols and copyright marks under two millimeters simply vanish.
Common Mistake: Many buyers attempt to simplify their logos to force them into an enamel format. They change proportions, remove colors, or delete secondary text. This practice introduces massive brand compliance risks. Corporate identity relies on consistency. Altering your logo to fit a manufacturing limitation damages brand recognition. You should adjust the manufacturing method to fit the logo, not the other way around.
How Offset Printed Pins Work: The Technical Advantage
Offset printing bypasses the limitations of liquid paint. It introduces high-resolution digital precision to metal manufacturing. The technical advantage lies in the CMYK process. This method uses four ink colors: Cyan, Magenta, Yellow, and Key (Black). Printers layer tiny dots of these four inks. They blend optically to create thousands of distinct shades.
The factory begins with a solid metal base. They typically use stainless steel, brass, or aluminum. They stamp or cut the exterior shape to perfectly match your custom logo outline. However, the interior surface remains completely flat. It acts as a blank canvas. The facility transfers your high-resolution digital artwork directly onto this flat metal surface. The machine prints the CMYK inks precisely.
Printed ink requires protection. Bare ink scratches easily. It degrades rapidly when exposed to environmental elements. Therefore, the role of the epoxy dome becomes critical. Factories apply a clear polyurethane or epoxy coating over the printed design. This liquid flows over the surface and cures into a hard, transparent shell.
Best Practice: Always request UV-resistant epoxy. Standard epoxy sometimes yellows after prolonged sun exposure. UV-resistant coatings maintain a crystal-clear finish for years.
This dome provides essential durability. It protects the vibrant inks against UV fading. It seals the metal badge against moisture and physical abrasion. Furthermore, it adds a premium, glossy dimensional effect. The dome catches the light and elevates the perceived value of the flat printed surface.
Offset Printed vs. Hard and Soft Enamel: Evaluation Framework
You must weigh visual aesthetics, color accuracy, and scalability when selecting a manufacturing style. Each method serves a distinct purpose. By comparing them directly, you can make an informed procurement decision.
Visual aesthetics and texture differ wildly across these methods. We can break down the tactile experiences:
Offset Printed: These feature a completely smooth surface under a glossy dome. They offer exact digital replication. You feel the curved glass-like epoxy rather than the metal lines.
Soft Enamel: These deliver a textured, dimensional feel. The paint sits slightly below the raised metal borders. You can feel the ridges when you rub your thumb across the surface.
Hard Enamel: A hard enamel pin provides a polished, flat surface. Workers overfill the recesses and sand them down perfectly flush. It creates a traditional, jewelry-like appearance. However, it remains strictly limited to solid, distinct colors.
Color matching accuracy heavily influences corporate orders. Traditional methods use the Pantone Matching System (PMS). You pick a specific solid color. The factory mixes the paint to match. Printed methods use the CMYK process. Print allows for infinite colors and subtle shading. Furthermore, you do not pay per-color upcharges with printed designs. You can print twenty colors for the same price as two.
Production speed and scalability strongly favor printing. Standard methods require labor-intensive steps. Workers must inject paint manually into tiny sections. They must bake the metal repeatedly to cure different colors. Offset printing bypasses these bottlenecks. Once the factory cuts the metal blanks, the printing process is highly automated. It is incredibly scalable for tight-deadline corporate events or trade shows.
Let us review the fundamental differences in the comprehensive summary below.
Pin Manufacturing Method Comparison Chart
Feature
Offset Printed
Hard Enamel
Soft Enamel
Color Style
Full CMYK, Gradients
Solid Spot Colors (PMS)
Solid Spot Colors (PMS)
Surface Texture
Smooth Dome
Polished Flat
Textured / Ridged
Metal Borders
Not Required
Required Between Colors
Required Between Colors
Production Speed
Fast / Automated
Slow / Manual
Moderate / Manual
Fine Detail
Photographic Quality
Low (Requires Space)
Moderate
Analyze the cost-to-outcome ratio before ordering. Offset designs often carry lower unit costs at high volumes. They eliminate manual coloring labor. You bypass the complex baking steps. You achieve stunning visual realism at a highly competitive price point.
Implementation Realities: Risks and Artwork Requirements
Print quality strictly dictates final product quality. You cannot achieve a sharp result from a blurry file. You must supply perfect digital assets to the factory. If you fail to prepare your artwork correctly, the final product will suffer from pixelation and color shifting.
Resolution and file formats represent your first hurdle. We highly recommend using vector files. Vector files use mathematical equations to define lines and shapes. Formats like .AI, .EPS, and vector .PDF can scale infinitely without losing quality. If you must use raster images (.JPG, .PNG), they require extreme resolution. You must provide artwork at 300 DPI (Dots Per Inch) or higher. Web images sit at 72 DPI. If you pull a logo from a website and print it, the edges will look jagged and blurry.
Common Mistake: Submitting artwork in the RGB color space. Screens use Red, Green, and Blue light to display colors. Printers use CMYK inks. The RGB gamut is much larger than the CMYK gamut. Bright neon greens and electric blues look stunning on a monitor. They look dull and muddy when printed in ink. You must convert your files to CMYK before submission. This allows you to see the exact color shift and adjust your design accordingly. You should recommend specific Pantone targets for the printer to calibrate against.
You must also understand edge bleed limitations. Printers handle the outer edges carefully. They rarely print ink directly over the absolute edge of the cut metal. Doing so causes ink to chip or pool unevenly. Instead, factories typically require a slight metal margin around the printed image. This thin border acts as a retaining wall. It ensures the liquid epoxy dome adheres properly and seals the design completely. You should account for this metallic rim in your digital mockups.
Shortlisting and Procurement: How to Specify Your Order
Navigating the procurement process requires attention to detail. You must specify exact requirements to prevent factory errors. The first critical step involves requesting digital proofs. Standardize the expectation that buyers must review a pre-production digital proof. Do not approve an order blindly.
When you review the proof, look for three specific elements:
Border Thickness: Check the unprinted metal margin. Ensure it does not awkwardly clip your logo text.
Color Saturation: Verify the CMYK conversion. Ensure shadows and highlights remain visible.
Cut-Line Accuracy: Inspect the exterior shape. Make sure the factory accurately traced your custom die-cut boundaries.
You must choose the right base metal and plating. Even though the front is entirely printed, the back and the thin edges remain highly visible. Guide your team on selecting the right finish. Black nickel offers a modern, sleek border. Silver plating suits tech companies and clean designs. Gold-tone finishes complement traditional corporate artwork. The plating should elevate the printed design, not clash with it.
Consider upgrades and hybrid options for high-budget projects. You can combine manufacturing methods. Factories create "hybrid pins" by combining die-struck metal borders with localized printed inserts. Imagine a heavy, 3D sculpted metal frame. Inside the center recess, the factory sets a full-color printed logo under a smooth dome. This gives buyers the dimensional heft of traditional metalwork alongside complex printed elements.
Finally, select the appropriate clutch and backing. Tie this decision directly to the end-use case. Rubber clutches grip tightly without scratching the skin. They work perfectly for consumer trading events. Standard butterfly clutches puncture thick denim and jackets securely. Locking jewelry clasps cost slightly more. However, they prevent accidental loss entirely. They remain the standard choice for valuable corporate employee recognition awards.
Conclusion
Translating digital perfection into physical metal requires the right methodology. You must abandon restrictive metal borders when complex artwork demands it. By embracing modern printing capabilities, you bypass the traditional limitations of liquid paint and die-struck stamping.
Choose traditional enamel when you want a tactile, heavy, jewelry-like feel for simple spot-color designs.
Select offset printed pins when you demand uncompromised accuracy, photographic realism, gradients, and micro-typography.
Always submit high-resolution CMYK artwork to prevent color shifting and blurry results.
Leverage the epoxy dome for both premium aesthetics and essential long-term durability.
Take action today. Gather your complex corporate logos and submit your current artwork for a technical feasibility review. A specialized manufacturer can quickly determine the most effective method to bring your exact brand vision to life.
FAQ
Q: Are offset printed pins less durable than hard enamel pins?
A: They offer excellent durability, but in a different way. Hard enamel uses glass-like paint baked at high temperatures, making it highly scratch-resistant. Printed pins rely on a clear epoxy dome for protection. While the dome resists fading and moisture perfectly, it can sustain minor surface scratches over years of heavy friction. However, for everyday wear, both remain exceptionally durable.
Q: Can you print white ink on a metal badge?
A: Yes, factories handle white in two ways. They can print a solid white base layer under your design to ensure colors pop vibrantly. Alternatively, they can use negative space. By leaving certain areas unprinted, they allow the raw silver or gold metal base to shine through, creating unique metallic highlights.
Q: What is the standard minimum order quantity (MOQ) for offset printed pins?
A: Standard factories usually require an MOQ of 100 units. Printing requires specific setup steps, including cutting the custom metal blanks and calibrating the CMYK presses. Running fewer than 100 pieces makes the initial setup costs disproportionately high per unit. Ordering in bulk drastically reduces your unit price.
Q: Do offset printed pins feel cheap or lightweight?
A: No, they do not feel cheap. The base material consists of solid metal, usually brass, iron, or stainless steel. They provide comparable weight and heft to traditional items depending on the chosen metal thickness. The addition of the thick epoxy dome further enhances the premium, substantial feel in the hand.
Transform your brand IP into durable 3D figure trophies. Learn design for manufacturability, material selection, and scaling from prototype to volume production.