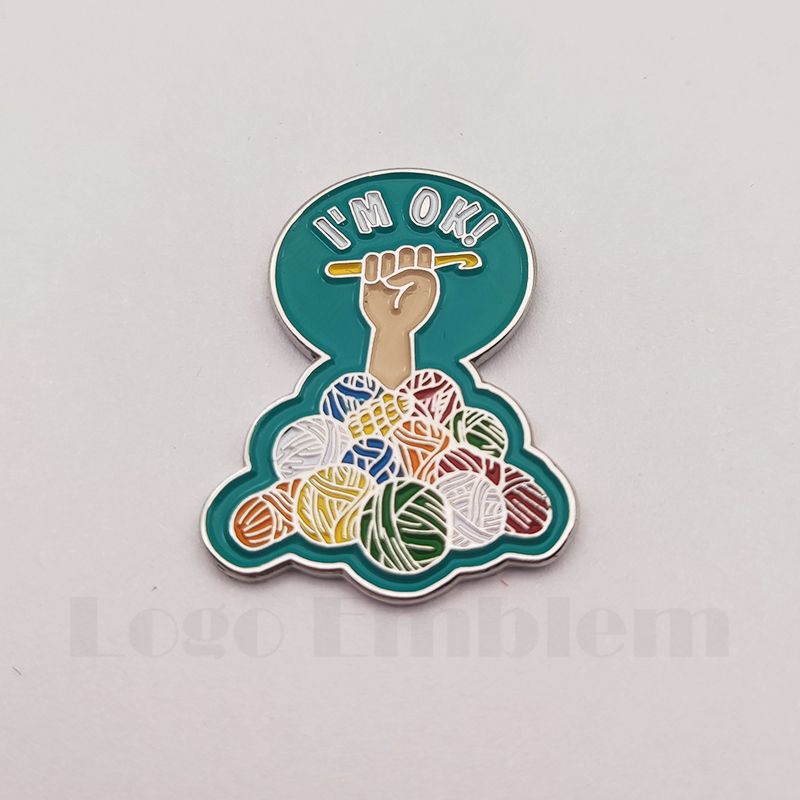
Digital badges dominate our screens today, offering quick but fleeting recognition. Yet, organizations are rapidly shifting back to tangible symbols of belonging. A well-crafted physical token carries profound psychological weight. Digital equivalents simply cannot replicate this deep sense of pride. Unfortunately, many clubs settle for poorly designed items. Cheaply manufactured pins fail to drive meaningful member engagement. Even worse, they can actively devalue your organization's brand prestige. Poor material quality signals a lack of care to your members.
You need a clear, vendor-neutral framework to avoid these costly mistakes. We will help you evaluate, design, and procure these vital assets confidently. You will learn how to properly align badge design with your specific community tiering. Ultimately, we will guide you in matching your creative vision to your budget constraints.
Key Takeaways
Physical membership pins serve as high-ROI drivers for community retention, fundraising, and tiered recognition.
Selecting between a hard enamel pin, soft enamel pin, or die-struck metal badge dictates the perceived value and durability of the final product.
Simplifying complex association logos to accommodate physical manufacturing constraints is the most critical step in minimizing production risks.
Evaluating manufacturers requires looking past unit price to assess mold fees, backing durability, and Pantone-matching accuracy.
The Strategic Role of Membership Pins in Community Building
Tangible Proof of Belonging
Physical artifacts act as powerful social anchors. They reinforce exclusivity and build a shared identity within clubs, fraternities, and sporting associations. When you issue physical membership pins, you give members a permanent token of their achievement. Members wear these items proudly on lapels, bags, or lanyards. This creates an immediate visual connection among peers. It transforms abstract membership status into a tangible reality. A well-designed pin sparks conversations and builds community cohesion naturally.
Tiered Recognition Frameworks
You can effectively manage community hierarchies through clever design variations. Instead of ordering entirely separate designs for different member levels, you can alter finishes or sizes. This saves money while establishing clear visual benchmarks for success. Implementing a tiered framework motivates members to reach the next level of involvement.
Plating Variations: Use bronze plating for new recruits, silver for active members, and gold for leadership roles.
Size Differences: Issue standard 0.75-inch designs for general members. Reserve larger 1.25-inch versions for board members or founders.
Accessory Add-ons: Add small synthetic gemstones or distinct border colors to signify years of tenure, such as a 10-year veteran status.
Fundraising and Merchandising ROI
Custom pins offer exceptional economics for non-profits and associations. The baseline cost to acquire these items in bulk is relatively low. However, their perceived retail value or donation-incentive value remains incredibly high. A club might spend less than two dollars per unit on a high-quality run. They can then offer that same item as a "thank you" gift for a fifty-dollar donation. This massive margin makes them highly effective fundraising tools. They do not just generate revenue. They also turn your donors into walking brand ambassadors.
Material Evaluation: Hard Enamel Pin vs. Soft Enamel Pin vs. Metal Badge
Hard Enamel Pins (The Premium Standard)
A hard enamel pin represents the pinnacle of modern lapel accessories. Manufacturers fill the recessed areas of the metal die with colored enamel. They then bake the items at high temperatures. Finally, they sand the surface down until it is perfectly flat. This process yields a flushed, smooth surface. It feels incredibly premium to the touch. It is highly resistant to scratching and fading over time. This material is best suited for VIP members, corporate associations, and long-term milestone awards. However, keep in mind that this complex process requires a higher unit cost and a slightly longer production timeline.
Soft Enamel Pins (The Cost-Effective Choice)
If you need vibrant colors on a tighter budget, a soft enamel pin is the ideal solution. In this process, the enamel paint sits slightly below the raised metal borders. This creates a distinct textured feel. You can physically feel the ridges of the design when you rub your thumb across it. They are best for event giveaways, student clubs, and high-volume distributions. They offer brilliant color saturation and lower upfront costs. However, they are more susceptible to long-term wear unless you apply a protective epoxy coating.
Die-Struck Metal Badges (The Classic Look)
Some organizations prefer to skip colors altogether. A die-struck metal badge relies entirely on raised and recessed metal to showcase the design. Manufacturers press your logo directly into raw brass, copper, or zinc alloy. They often apply an antique finish to darken the recessed areas. This maximizes visual contrast. This style offers a distinguished, understated aesthetic. It is incredibly popular among sporting associations, law enforcement affiliates, and traditional fraternities. It signals heritage, durability, and serious commitment.
No color fill. Relief-style raised and lowered metal.
Extremely durable. Ages well with natural patina.
Law enforcement, fraternities, traditional sports clubs.
Translating Association Branding into Physical Badge Design
The Scale Problem
Many organizations make a critical mistake when designing their first physical products. They attempt to shrink a highly detailed digital logo down to a standard 1-inch size. Digital screens can display infinite detail. Physical metal molds cannot. Tiny text becomes illegible. Intricate crest lines bleed into one another. You must simplify your branding to accommodate physical manufacturing constraints. Focus on the core silhouette of your logo. Remove secondary mottos, micro-text, and overly complex background gradients. A clean, bold design always reads better from a distance.
Best Practice: Print your design on a piece of paper exactly at the 1-inch or 1.25-inch scale. Tape it to a shirt and step back three feet. If you cannot recognize the logo, your design is too complex.
Color and Compliance
Brand consistency is critical for established associations. You cannot rely on a generic "blue" or "red". You must use the Pantone Matching System (PMS). Reputable manufacturers use PMS Solid Coated codes to mix their liquid enamels precisely. This ensures your final product matches your official brand guidelines exactly. Furthermore, you must understand the physical limits of enamel color separation. You cannot have two enamel colors touching each other directly. A raised metal border must separate every single color. This metal line acts as a dam to hold the liquid paint in place during the baking process.
Backing and Hardware Selection
The attachment mechanism is just as important as the front design. You must evaluate the hardware based on your primary use case. Selecting the wrong backing leads to lost items or damaged clothing.
Butterfly Clutches: The industry standard. They are cheap, reliable, and perfect for attaching to thick jackets, backpacks, or lanyards.
Rubber Caps: The best choice for skin-contact comfort. They fit snugly over the post and prevent scratching. They are ideal for lightweight shirts or uniforms worn directly against the skin.
Magnetic Backings: The premium option for formal wear. Instead of a sharp post piercing the fabric, a strong magnet holds the piece in place. This prevents permanent holes in expensive suits or dresses.
Navigating Production Risks and Quality Pitfalls
Discoloration and Plating Failures
Quality issues often hide beneath the surface. One of the most common pitfalls in custom manufacturing is plating failure. Cheap vendors apply incredibly thin layers of gold, silver, or nickel plating to the base metal. Over time, friction from daily wear rubs this plating away. The piece begins to tarnish or show the raw zinc alloy underneath. You should specifically ask your manufacturer about their plating thickness. Request anti-oxidizing treatments or clear protective sprays to extend the lifespan of your metal finishes. This simple step prevents your brand from looking cheap after a few months of use.
The "Epoxy Dome" Compromise
Many buyers try to upgrade soft enamel designs by requesting an "epoxy dome." The factory pours a clear liquid resin over the top of the finished product. It hardens into a smooth, glass-like dome. This prevents scratching and gives a glossy finish. However, you must weigh the pros and cons. While it offers protection, epoxy resin reacts poorly to prolonged UV exposure. Over several years, the clear dome can turn slightly yellow, dulling your brand colors. If you want a smooth surface with long-term vibrancy, it is almost always better to invest in hard enamel rather than settling for an epoxy dome over soft enamel.
Lead Times and Delivery Realities
You must understand standard manufacturing timelines to plan your campaigns effectively. Creating custom metal products is a multi-step physical process. A standard timeline usually requires two to three weeks for production, plus an additional week for shipping. This includes mold creation, stamping, coloring, curing, and final quality assurance (QA). Be extremely wary of vendors promising turnaround times under ten days. Expedited promises almost always require skipping crucial QA steps. Factories might rush the enamel curing process, leading to bubbling. Always pad your timeline by at least two weeks before your major event.
Procurement Strategy: Shortlisting Vendors and Managing Costs
Understanding the True Cost Per Unit
Evaluating manufacturers requires looking past the base unit price. A quoted price of $1.00 per piece might seem attractive initially. However, factories often bury hidden costs in the final invoice. You must calculate the overall unit expenditure by factoring in all additional fees. Most factories charge an initial mold fee, which can range from $50 to $100 depending on complexity. Many also charge multi-color surcharges if your design features more than four PMS colors. Finally, international shipping fees can drastically alter your budget. Always request an all-inclusive, landed quote before making a decision.
Minimum Order Quantities (MOQs)
Custom metal fabrication relies on economies of scale. Setting up the heavy machinery and cutting the steel mold takes the same amount of time for 50 pieces as it does for 500. Therefore, manufacturers enforce Minimum Order Quantities (MOQs). Standard MOQs sit around 100 units. You must balance your inventory needs with these requirements. Avoid over-purchasing just to hit a higher tier, but recognize that buying 200 units might only cost slightly more than buying 100 due to volume discounts. Calculate your projected growth for the next two years and order accordingly.
Common Mistake: Ordering exactly 50 pieces for a 50-person club. Always order a 15% to 20% buffer for lost items, new recruits, and archival purposes.
Vendor Evaluation Criteria
Not all suppliers maintain the same ethical and quality standards. You need a systematic way to evaluate them before handing over your organization's funds. Look for vendors who offer transparency throughout the process. A trustworthy supplier should provide free digital proofing before you pay for the mold. They should have clear revision policies if the proof does not match your vision. Ask if they provide pre-shipment photographic verification. Seeing a photo of the finished product on the factory floor allows you to catch errors before they ship across the world. Finally, confirm that you retain ownership of the die/mold. A reputable factory will store your mold free of charge for future reorders.
Conclusion
Choosing the right physical identifier for your organization is a powerful branding exercise. It requires a careful balance of accurate brand representation, material appropriateness, and budget reality. When executed correctly, these small items generate massive loyalty and pride among your community members.
Next Steps:
Audit your current digital logo to see if it scales down cleanly to a 1-inch physical format.
Establish a tiered recognition system to determine if you need multiple plating finishes.
Determine your ideal attachment hardware based on how your members typically dress.
Request a formal, all-inclusive digital proof from a shortlisted manufacturer before committing to a bulk order.
FAQ
Q: What is the standard size for custom membership pins?
A: Standard dimensions typically range from 0.75 inches to 1.25 inches. The ideal size depends heavily on your logo's complexity. Simple geometric logos work beautifully at 0.75 inches. If your design includes text or detailed crests, you should opt for 1 inch to 1.25 inches to ensure absolute clarity.
Q: Do I have to pay a mold fee every time I reorder?
A: No. Industry standard practice dictates that the manufacturer retains your custom mold for 2 to 3 years after your last order. If you place a reorder using the exact same design and dimensions within that timeframe, they will waive the mold setup fee.
Q: Can you replicate exact gradient colors on enamel pins?
A: No. Liquid enamel cannot produce gradients or shading. Enamel requires solid, separated blocks of color divided by metal lines. If your logo absolutely requires gradients, photographs, or microscopic details, you must request offset printed pins with an epoxy protective coating instead.
Q: How long does it take to manufacture and receive a bulk order?
A: You should expect a realistic timeline of 3 to 4 weeks from final proof approval. This covers roughly 2 to 3 weeks for physical production (mold cutting, pressing, coloring, and baking) and an additional 1 week for transit and final delivery.
Transform your brand IP into durable 3D figure trophies. Learn design for manufacturability, material selection, and scaling from prototype to volume production.
Discover how custom membership pins boost loyalty, recognition, and fundraising—plus tips on materials, design, and vendor selection to avoid costly mistakes.